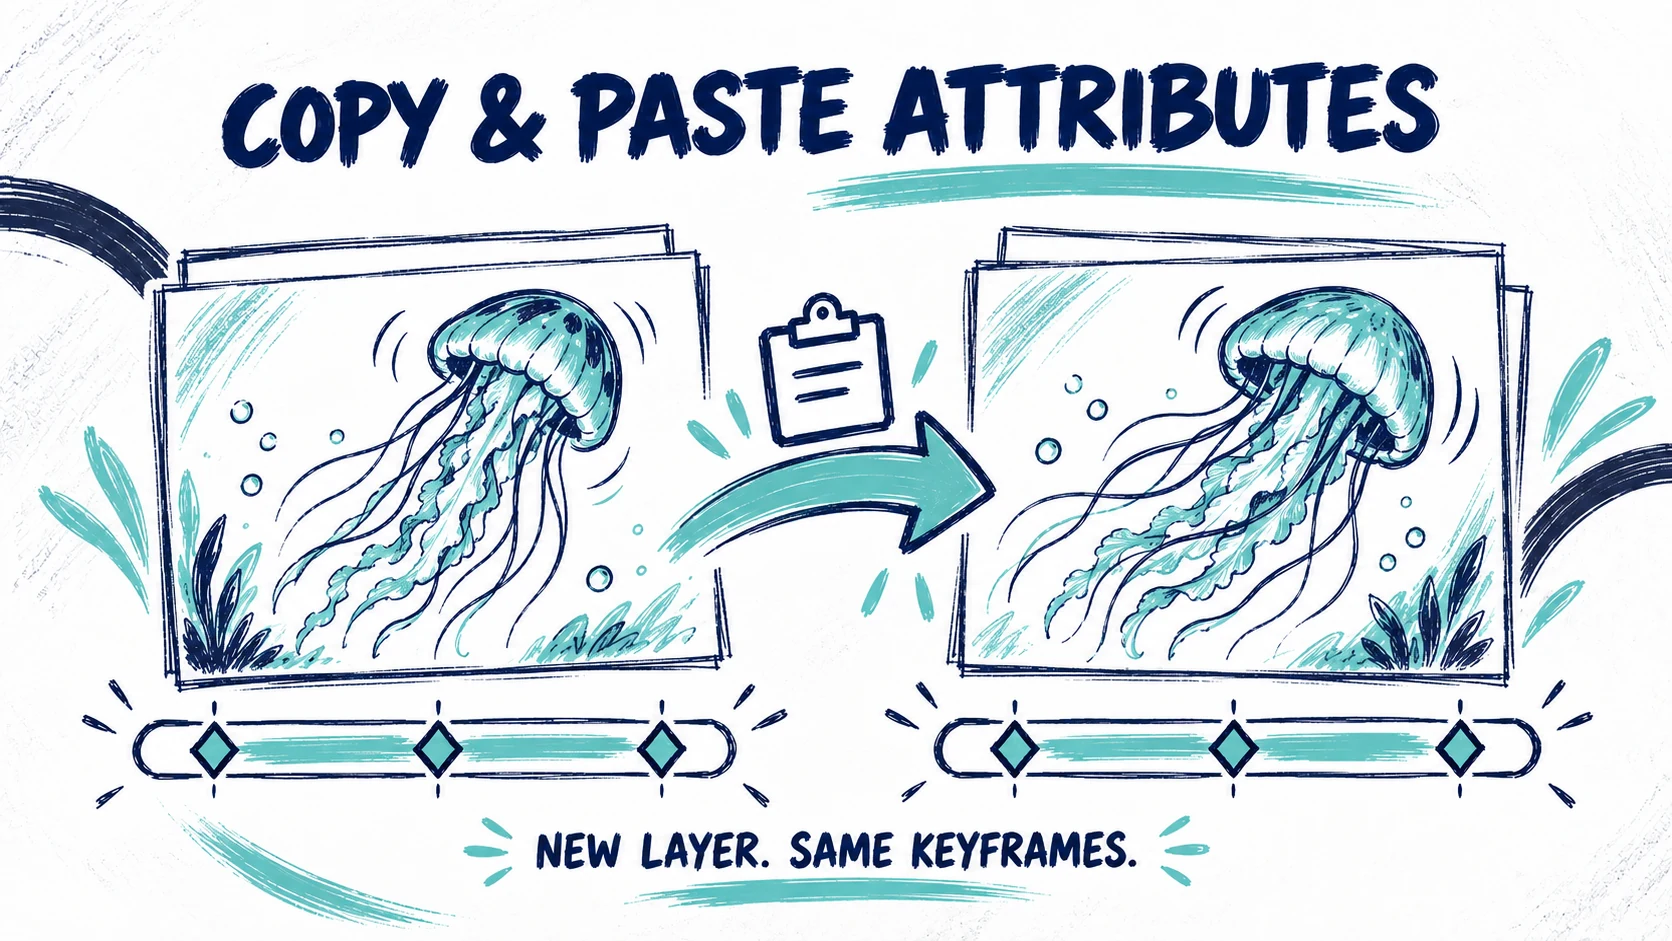

You have already tuned an animation: the fades land at the right moments, the movement fits the artwork and the timing works with the music. Then you prepare a better image, video or 3D model. You can bring those existing keyframes onto the new layer instead of rebuilding them one by one.
In Painta, Copy attributes takes a snapshot of a layer's settings. Paste attributes lets you choose which groups to apply to another layer. The destination keeps its own media file. This tutorial shows how to reuse an animation while keeping control over the new layer's placement and appearance.
Watch the 23-second walkthrough below, then follow the written steps at your own pace. The animation uses real editor captures from a draft copy of MedusASCII.
Before you start
Keep the original layer until you have checked the result. Add the revised asset as a separate layer and give the two layers recognisable names. For the most predictable result, transfer between the same layer type: image to image, video to video or 3D model to 3D model.
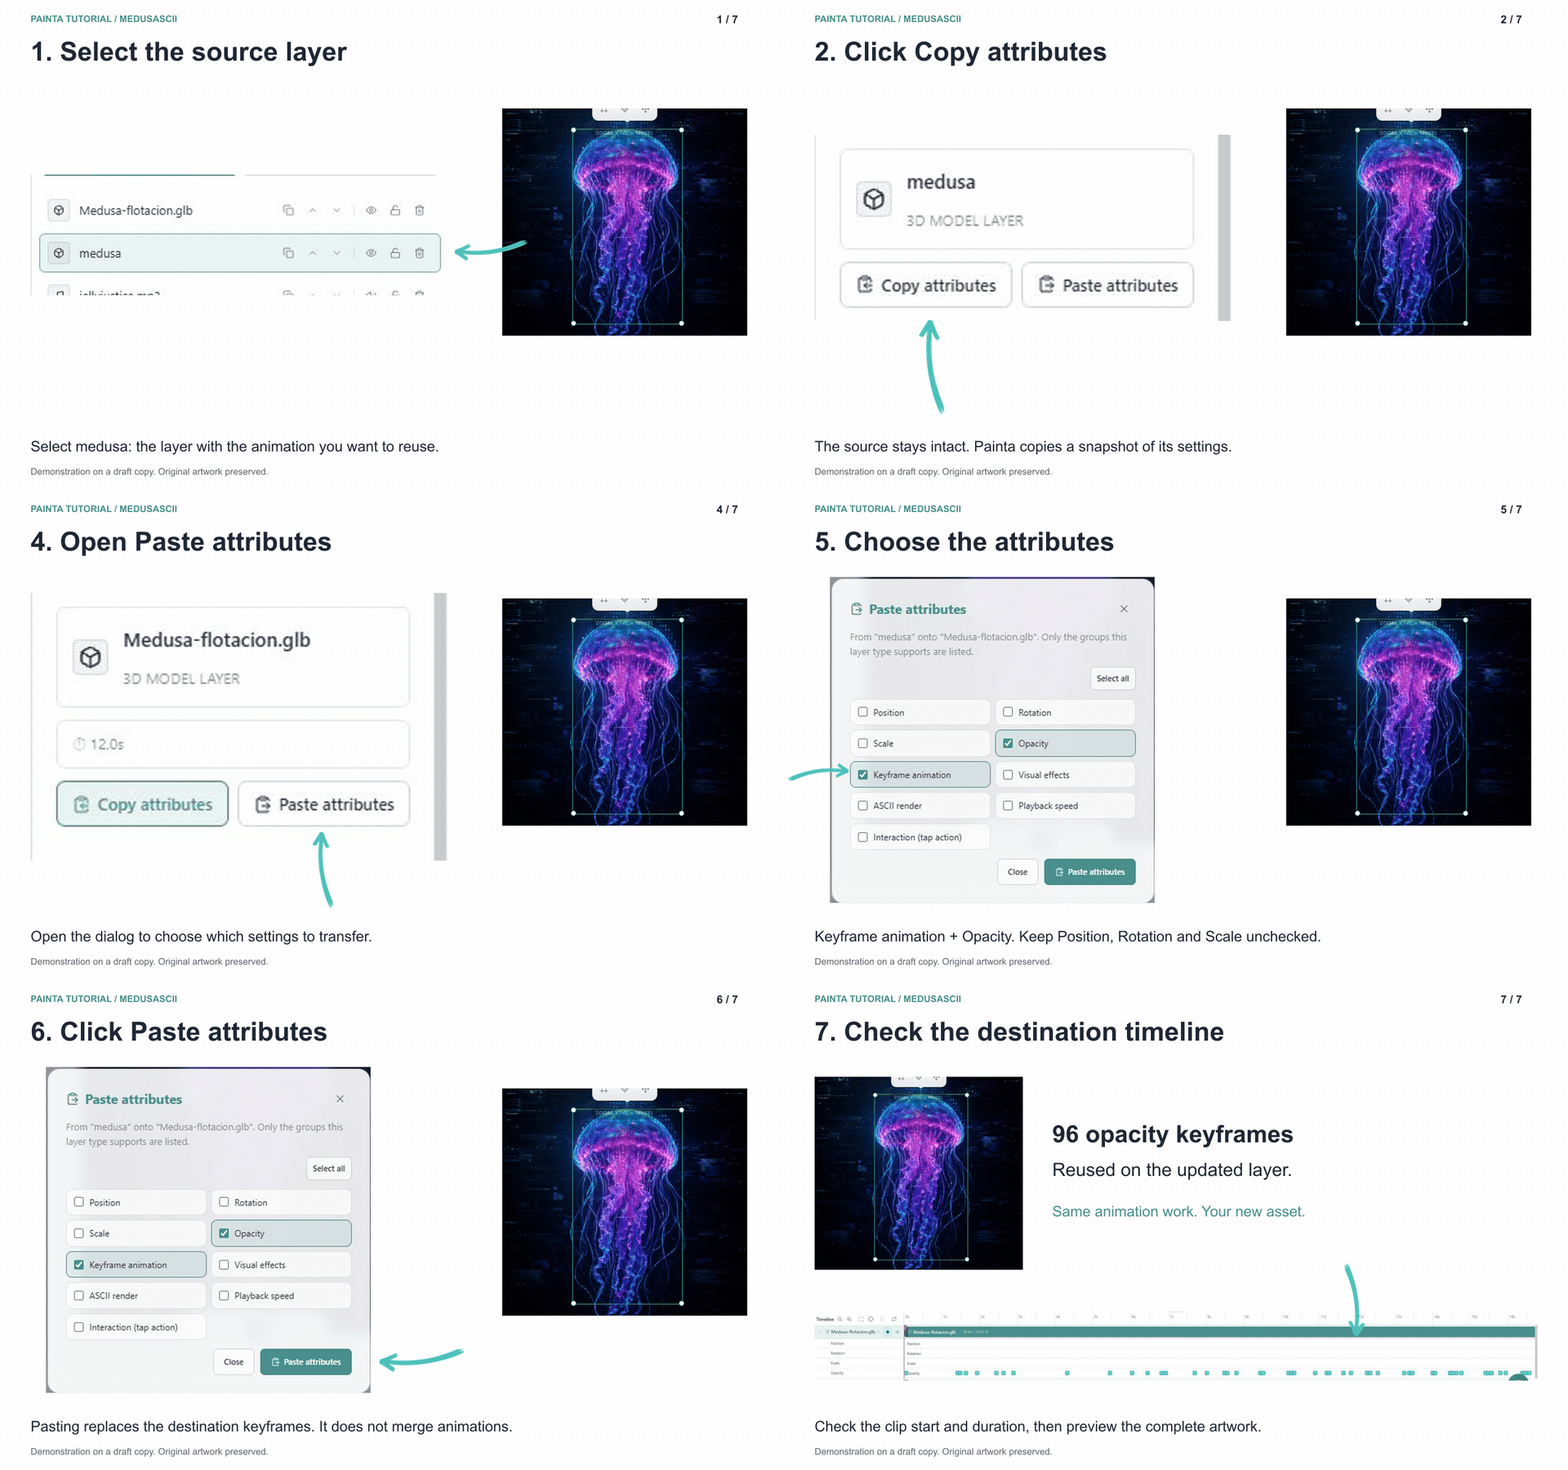
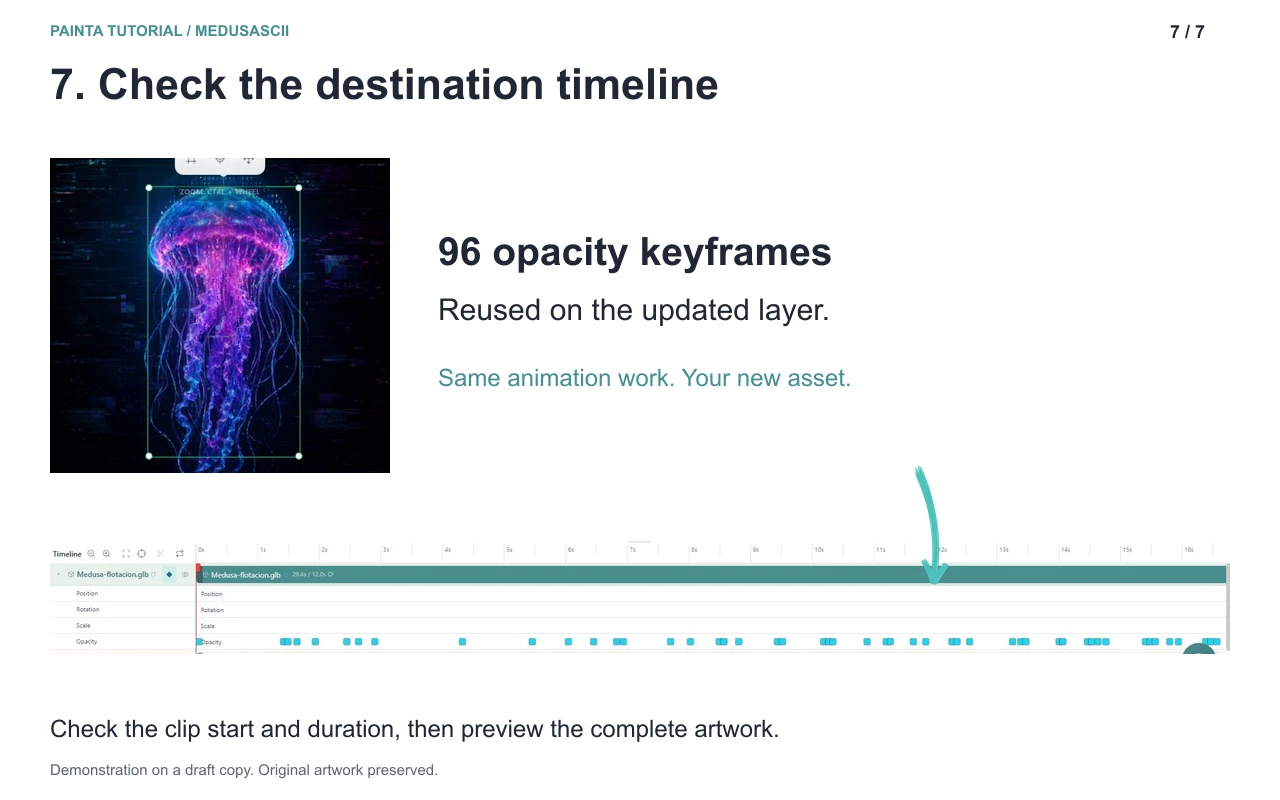
Our example uses a draft copy of the MedusASCII artwork. The source is named medusa and the destination is Medusa-flotacion.glb. We copied the source's opacity settings and keyframe animation onto the destination, then checked its 96 opacity keyframes. The original artwork was preserved.
1. Copy from the layer whose animation you want to keep
Select the original layer in Layers. In the Properties panel, click Copy attributes. The button briefly confirms Copied! Copying does not change the source layer or create a duplicate of its media.
The copy is a snapshot, not a live link. If you refine the original animation afterwards, click Copy attributes again before transferring the latest version.
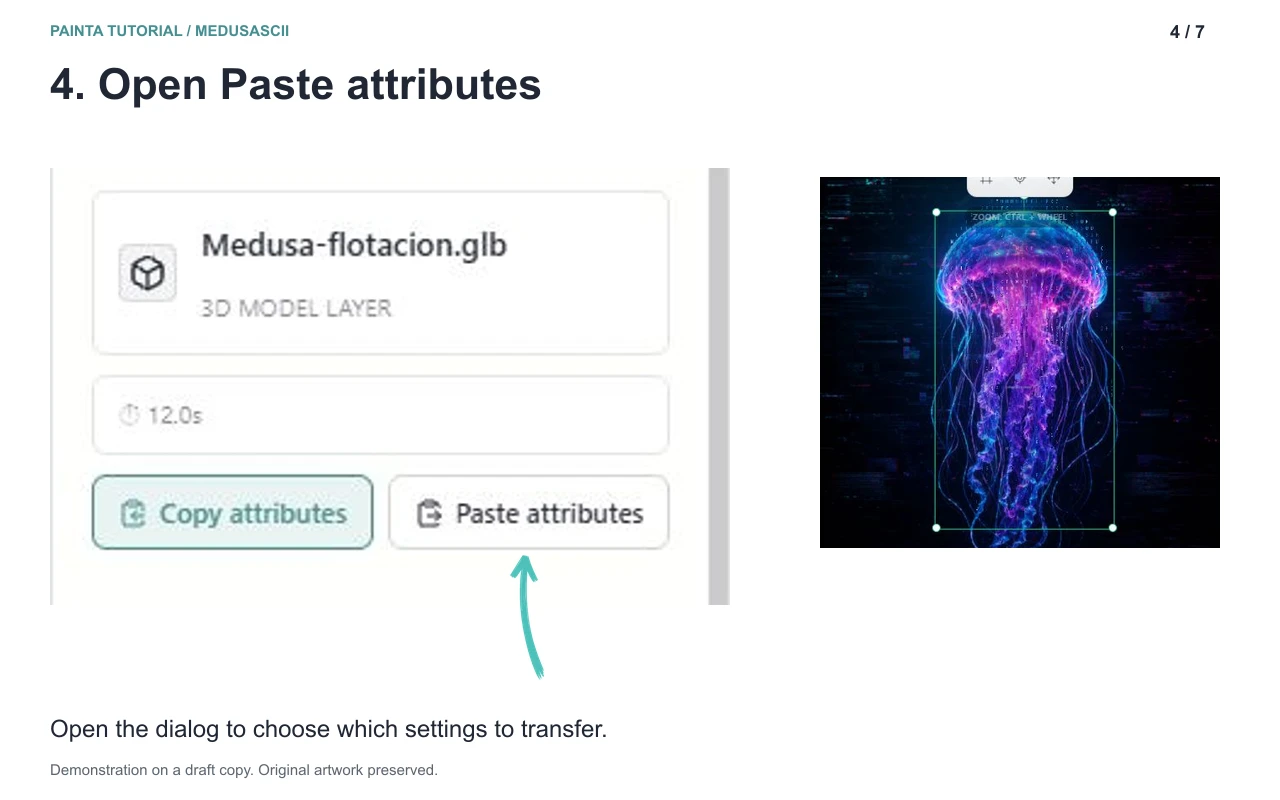
2. Select the updated layer and open Paste attributes
Select the new layer in Layers, then click Paste attributes in its Properties panel. Check the source and destination names at the top of the dialog before continuing.
Opening this dialog does not apply anything yet. It lists groups available from the copied layer that the destination type supports. The selection can remember a previous paste, so review the checkboxes every time.
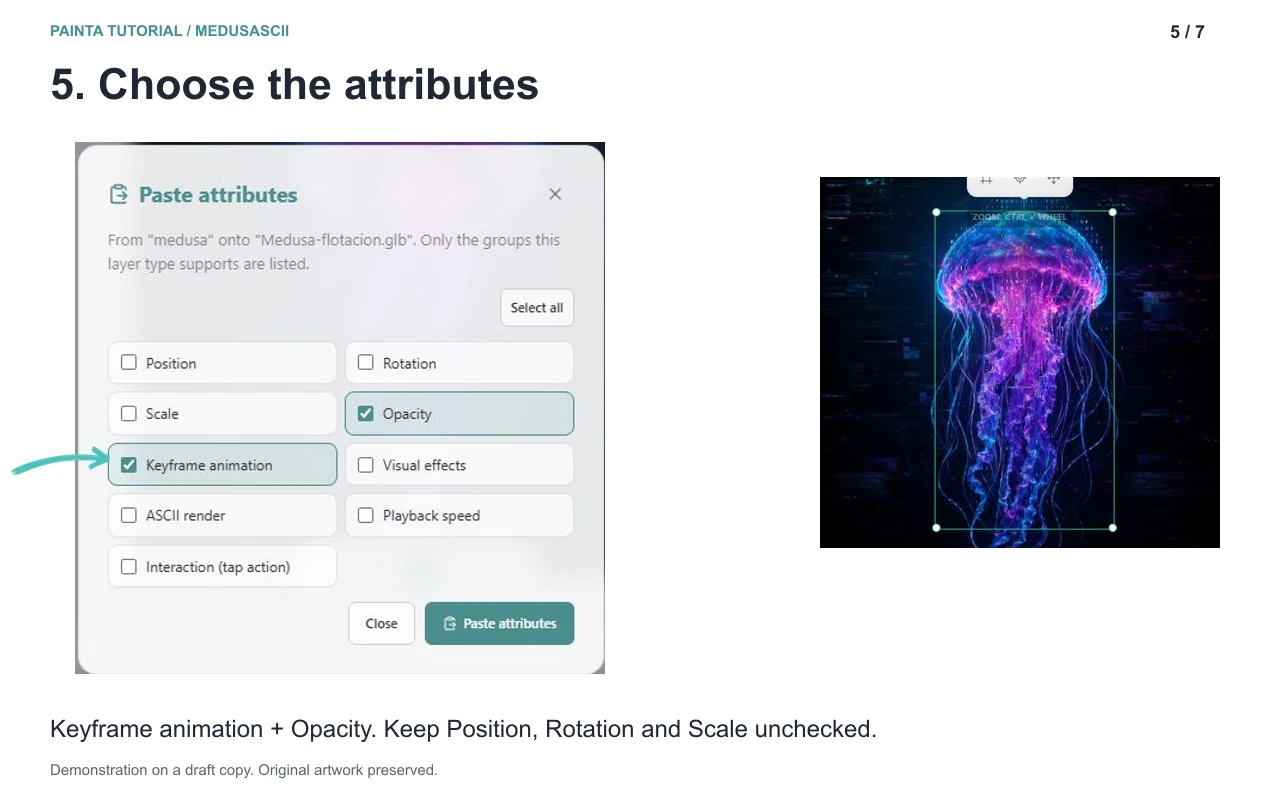
3. Choose the keyframes and only the settings you need
Select Keyframe animation to transfer the source layer's complete keyframe animation. Times, values and easing are copied together. This operation replaces the destination's existing keyframe set; it does not merge two animations or let you pick individual channels in this dialog.
For the illustrated MedusASCII opacity workflow, Keyframe animation and Opacity are selected. Position, Rotation and Scale are unchecked so their static settings on the destination stay as they are. Keep Opacity unchecked instead if you want to retain the destination's base opacity.
There is an important distinction: unchecking Position does not remove position channels from a copied animation. If the source has position keyframes, those channels still travel with Keyframe animation. Inspect the source timeline first when you only intend to reuse a fade.
If the new asset should also inherit the old placement, select Position, Rotation and Scale as needed. Different crops, dimensions or 3D model origins can still require alignment adjustments after pasting.
4. Apply, then check the timeline
Click Paste attributes at the bottom of the dialog. Expand the destination's keyframe tracks and inspect the beginning, middle and end of the animation. For an opacity sequence, check the fades as well as the moments when the layer is fully visible.
Pasting keeps the stored keyframe times. It does not move the animation to the current playhead, and it does not copy the layer's timeline start or duration. Compare the two clips and adjust the destination's start and active duration separately if they should play over the same part of the artwork.
Check playback speed and looping separately too. Playback speed has its own attribute group. For layers with audio controls, Audio (volume, loop) transfers those settings together; it is not a universal looping control for every layer type.
5. Reuse effects without changing the animation
You can also copy a particular look onto a layer that already has the animation you want. Copy from the styled layer, select the destination and leave Keyframe animation unchecked. Choose only the relevant group, such as Visual effects, ASCII render or Chroma key, when it is available.
Other groups include Render filters (New Effects), Crop, Playback speed, Audio (volume, loop), Interaction (tap action) and Text style. Availability depends on the layer types. For example, a 3D model does not offer a video's chroma controls.
Supported visual effects and render filters are added or updated by effect type. They do not necessarily clear other effects already on the destination. Read any notes after pasting: unsupported effects can be skipped and scene limits can leave an effect disabled. Preview the combined result.
6. Compare, preview and save
Use the layer visibility controls to compare the original and updated versions one at a time. Do not judge the replacement with both visible on top of each other. Keep the original while checking the new layer's timing, alignment, effects and relationship with the audio.
For a GLB, also inspect the animation built into the model. Copying Painta keyframes does not transfer a rig or animation clips embedded in the original 3D file. The new GLB brings its own model and built-in animation.
Use Preview to watch the complete sequence. If a paste was wrong, use Undo before continuing. Once the result is right, leave only the intended version visible and click Save Changes. Publishing a draft or updating a public artwork is a separate step; after that step, test the visitor experience on a phone.
Quick fixes
- Paste attributes is unavailable: select an editable layer and copy its attributes first. The reference target and layer groups are not supported sources or destinations for this workflow.
- Keyframe animation is missing: check that the source contains keyframes, then copy it again.
- The destination follows an unexpected path: the copied keyframe set may contain position, rotation or scale channels, even when the corresponding static attribute boxes were unchecked.
- Part of the sequence is missing: compare the destination clip's start and duration, then inspect the keyframe times and playback settings.
- A 3D model moves differently: compare its scale, origin and embedded animation as well as the Painta keyframes.
The useful habit is simple: preserve the working layer, copy its attributes, select the updated layer, choose what to transfer and preview the full result. You can revise the visual asset while keeping the animation work you have already built.