A good first AR artwork does one thing clearly. In this exercise, you will place a short video or transparent image over a physical artwork, save the composition and check that it is ready for publication.
You need a Painta account, a cropped JPG or PNG of the artwork and one visual file. Use the AR Art Starter Pack tutorial to prepare them. Work on a desktop or laptop if you want more room for the layer list, canvas and timeline.
1. Start with the physical artwork
Create a new artwork from your dashboard. Give it a recognisable title and create a picture or painting with a reference image. Upload the reference photograph when prompted. Check that the proportions match the physical piece before adding effects.
The reference is your alignment guide and the target used for recognition. Keep it stable while you build the scene. Replacing it with a differently cropped image later can require you to realign your layers.
2. Add one visible layer
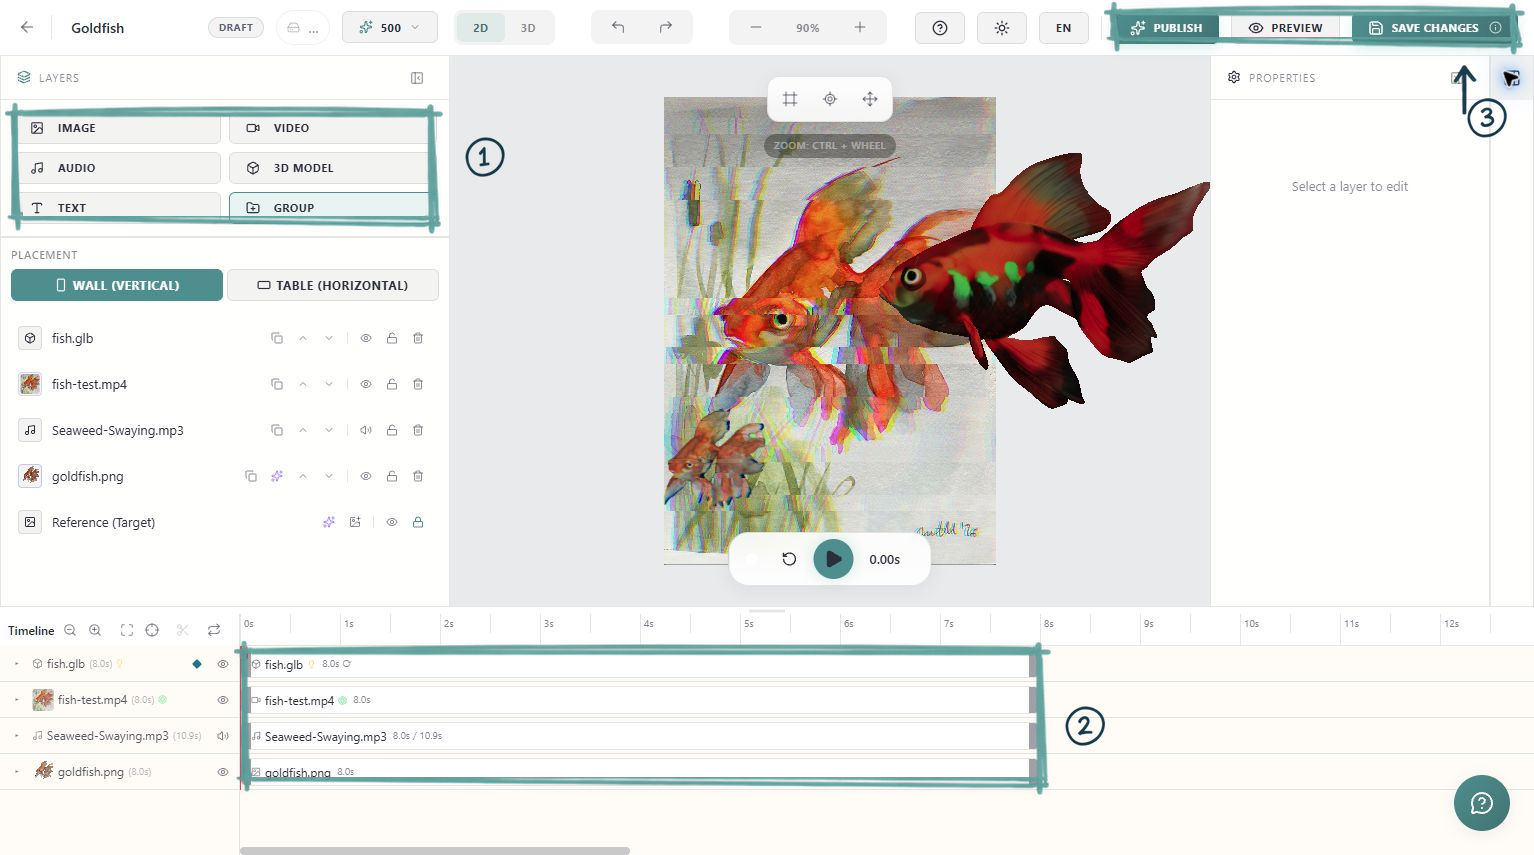
In the Layers panel, choose Image for a transparent PNG or Video for a clip. Use the asset picker to upload from your device or select a file already in your library. Wait until processing has finished and the media is available in the editor.
For this first exercise, choose a short opaque video that matches the artwork's proportions, or a single transparent subject such as a butterfly. A complicated green-screen clip adds an extra problem to solve; the Chroma Key tutorial covers that separately.
3. Align the layer to the artwork
Select the new layer. Adjust its position, scale and rotation with the canvas handles or the Transform controls in Properties. Align recognisable landmarks: a face, a horizon or the corner of an object. Keep the original proportions instead of stretching a face or figure to fill the frame.
For a full-picture video, inspect all four edges. For a transparent overlay, place it where it adds something to the painting. Play the clip and check that moving content stays where you intend throughout the sequence.
4. Check the timeline and sound
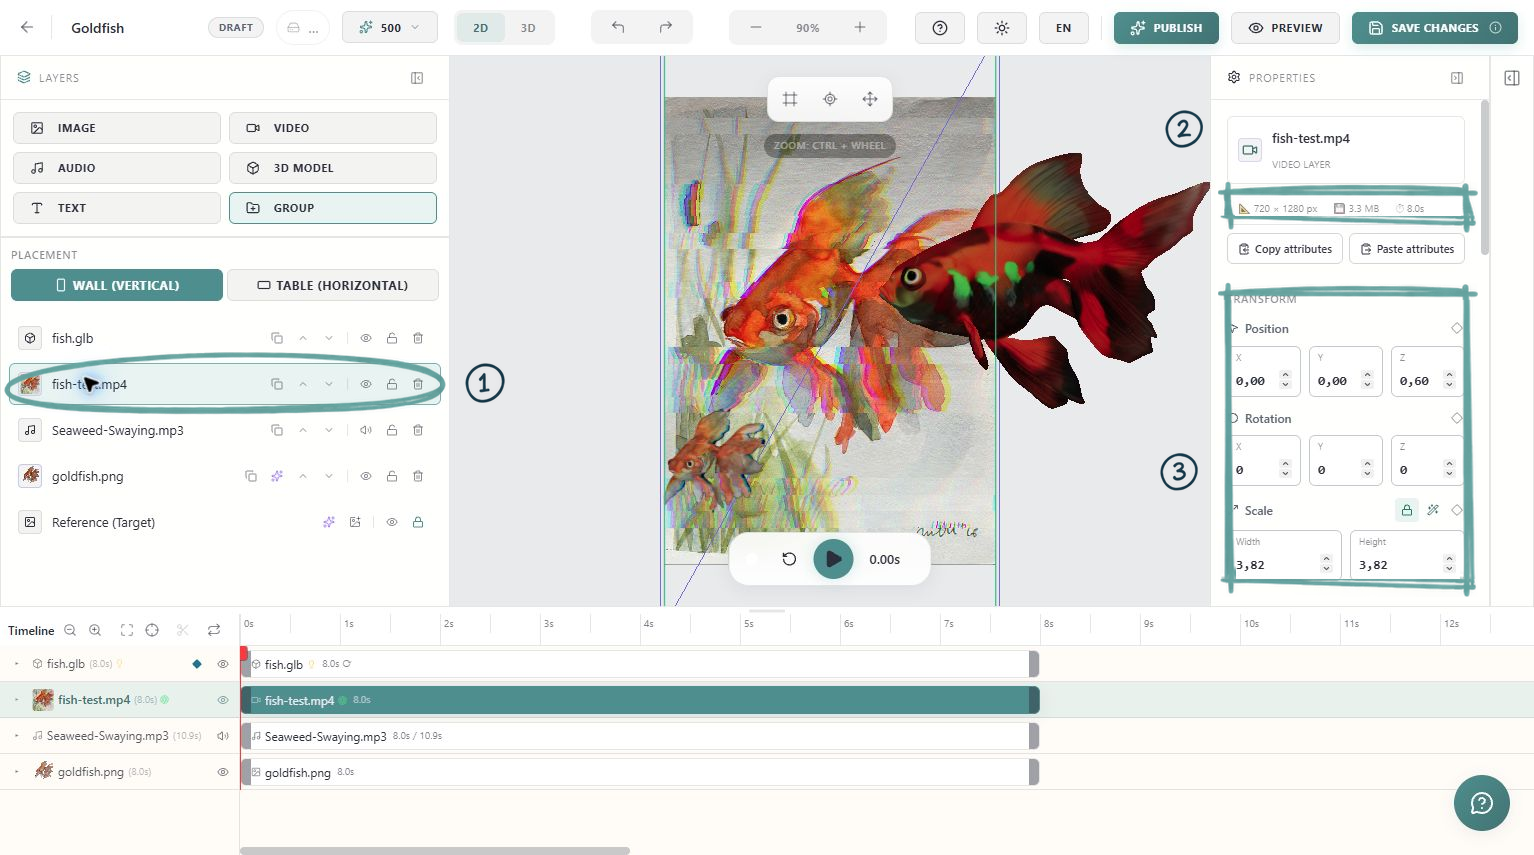
Move the playhead to the beginning and press Play. Confirm the visual layer is present for its intended duration. If you want a repeating clip, enable its Loop setting and watch the transition back to the start.
If the clip has sound, adjust its volume in Properties. Leave out a second soundtrack until you know whether you need it. Silence can be the right choice for an exhibition space.
5. Save and inspect the result
Use Save Changes and wait for the save confirmation. Use Preview to inspect the scene from the beginning. Look for stretched media, a visible backdrop you did not intend, a cut-off ending or doubled sound.
Saving stores your work. To make the experience available through its public link and QR code, use the publishing flow and complete its checks. Continue with Publish and Share Your AR Artwork when you are ready for that step.
Your first success check
You should have a named artwork with the correct reference, one aligned visual layer and a saved composition that plays from start to finish. After publication, open the public experience on a phone and test it against the actual artwork. An editor preview alone cannot confirm physical tracking.